Did you just upgrade from Pic Scanner (our lite app) to Pic Scanner Gold (advanced app)? Good choice. You’ll love all the extra features. You’ll also want to transfer photos from Pic Scanner to Gold? Also the albums you created and captions you added? It’s easy.
Pic Scanner – Transfer photos from old to Gold
There are two ways to do it. Which one is better for you will depend on how many scanned photos you have in Pic Scanner.
For light to moderate users:
If you have up to 800 photos in Pic Scanner’s Cropped gallery, proceed as follows (Expected transfer time: 1 minute):
1) Download Pic Scanner Gold on the same device as Pic Scanner.
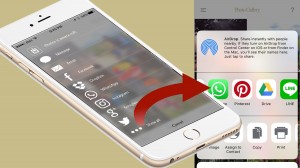
2) With both apps installed, launch Pic Scanner (old app). Tap Menu > Migrate. This compresses all the cropped photos, albums and captions. You’ll see a ‘Success!’ message, then sharing options appear. Select Pic Scanner Gold.
3) Pic Scanner Gold opens, and all your photos, albums and captions get ported over.
4) Check Gallery and Albums in Pic Scanner Gold to ensure everything looks good. After this, you can delete the old app to free up space on your device (Note that Originals are not transferred.)
For heavy users:
If you have thousands of photos, your iPhone or iPad may be unable to handle such a large transfer, and give up. If this happens, there’s another way (Expected transfer time: 10 minutes):
-
Pic Scanner on iPhone/iPad to computer
1) Create a folder named Pic Scanner Temp on your computer’s desktop.
2) Connect your device to computer with USB cable. Launch iTunes on computer, and select your device [See (1) below]
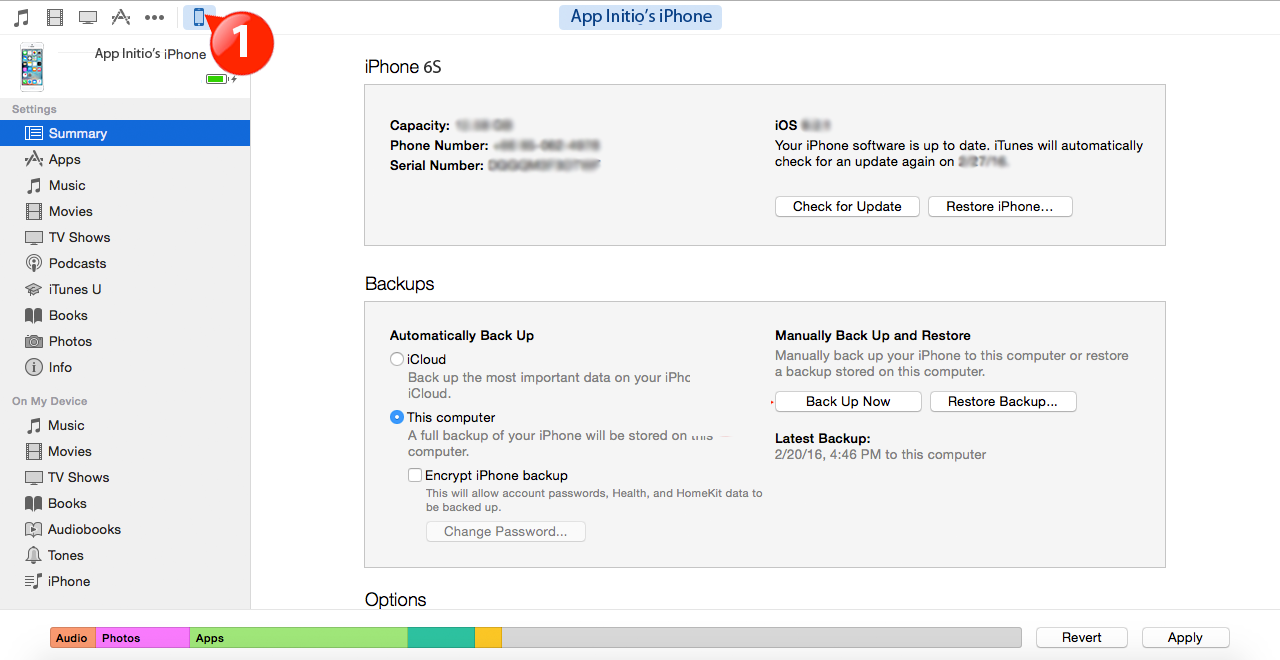
3) Click Apps in iTunes sidebar on the left [See (2) below]. Then in the right pane, scroll all the way down to File Sharing section (3). Locate and click Pic Scanner (4). The right side will show some folders and files e.g. original_images, splitted_images, etc. Select them all, and drag them into Pic Scanner Temp folder on desktop.

4) In Pic Scanner Temp folder, click on splitted_images folder. Check that your photos are in it, then delete original_images folder.
-
Computer to Pic Scanner Gold
5) In iTunes on the computer, click Apps in left sidebar, then scroll down the right pane to File Sharing (Same as in step 3 above). Click Pic Scanner Gold. The right side will show some folders.
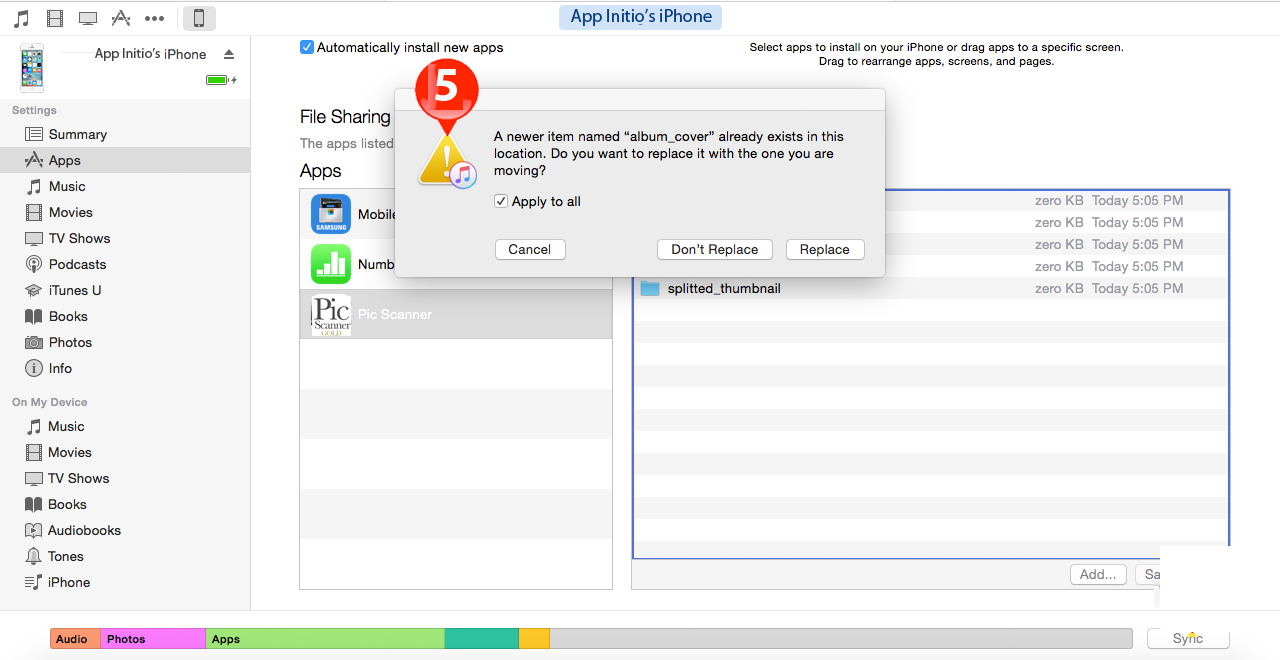
6) Select all folders and files in Pic Scanner Temp folder on the computer. Drag and drop them alongside the existing folders in iTunes Pic Scanner Gold folders (Care: Don’t drag Pic Scanner Temp folder into iTunes: only the files and folders within it.) In the warning pop-up box [See (5) below], check mark the Apply to all box, and click Replace. Voila! You are done!
7) Launch Pic Scanner Gold on your device. Check that all photos, albums and captions are there. Now you can delete Pic Scanner (the old app) to avoid duplication and free up space on your device.
Any problems, read these FAQs or drop us a line. We think you will enjoy your move from Pic Scanner to Pic Scanner Gold!