 This article explains how to use Pic Scanner Gold app’s powerful tools for editing photos. Even if you don’t yet use this app, do still read on: The same photo editing rules apply to other apps.
Smartphones have democratized photo editing! Twenty five years ago, only professionals were editing photos, using expensive dark room equipment. Now, everyone does it – using apps.
Instagram taught us to apply filters to everything in our camera rolls. Aviary gave us a battery of easy-to-use edit tools. Snapchat, Prisma and face morph apps use augmented reality and neural networks to transform our ordinary photos into quirky or artistic gems.
Let’s look past gimmicky and juvenile apps. Pic Scanner Gold app packs some great tools for photo editing. You’ve probably tried out some already, such as brightness, contrast, vibrance, highlights and shadows. But do you know exactly what these tools do, and when to use which?
Pic Scanner Gold’s Suite For Editing Photos
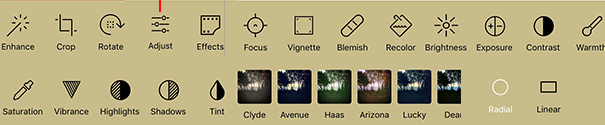
Pic Scanner Gold‘s toolkit for editing photos is powered by Adobe’s image editor. Below are some of the editing controls you’ll find in the app:
You can use Pic Scanner’s editor for scanned photos as well as for photos imported from your iPhone or iPad’s camera roll (Import button is located at the bottom of Gallery screen).
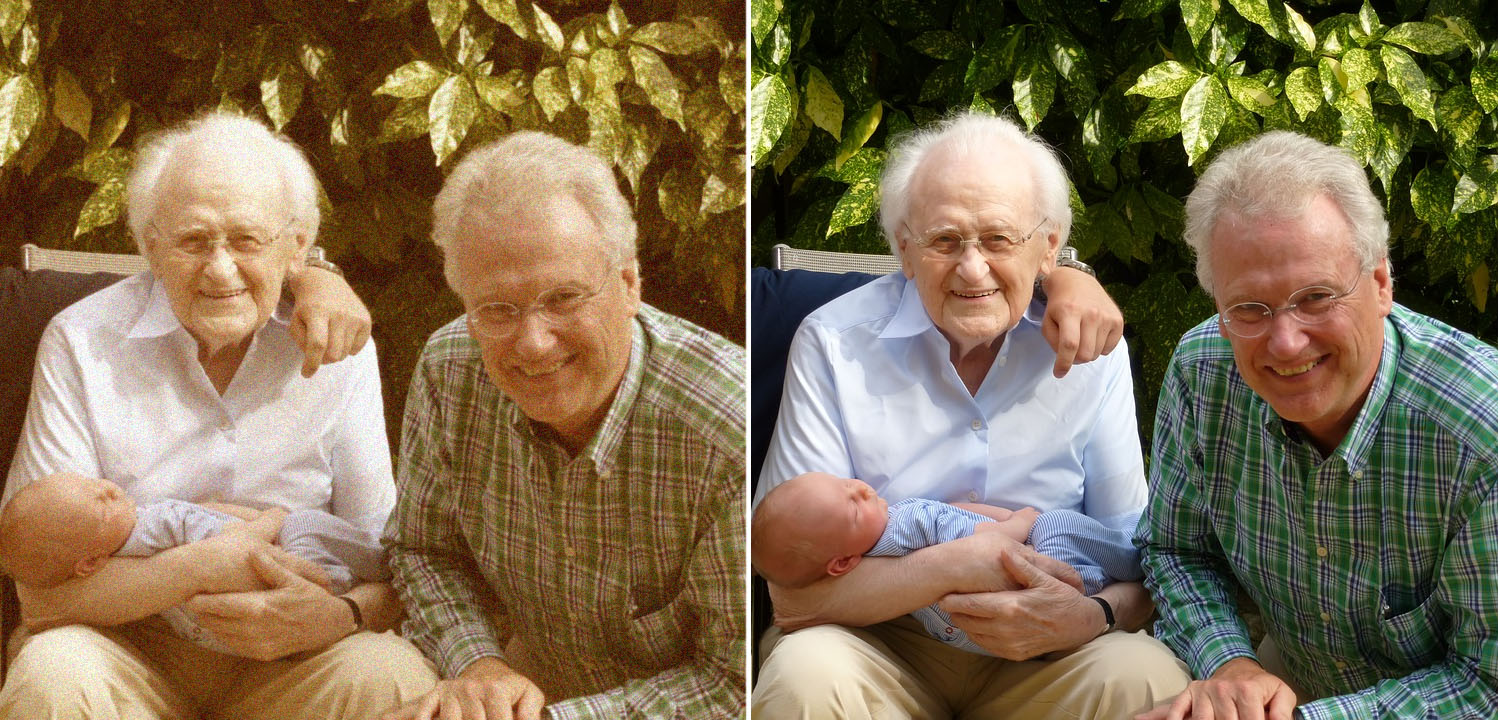
If your old photos are discolored, or have smudges, dust marks or color casts, a bit of editing can restore their original look.

Editing Photos with Pic Scanner Gold
Follow Pic Scanner Gold’s scanning tips to get good scans. The app also auto-enhances them, and you may not feel the need for retouching. But experiment with some of the app’s tools, and you’ll achieve beautiful results.
Accessing the Quick Editing Controls
Go to Gallery screen and tap on a photo’s thumbnail. This opens the photo on Review & Edit screen. Look at the bottom navigation bar.
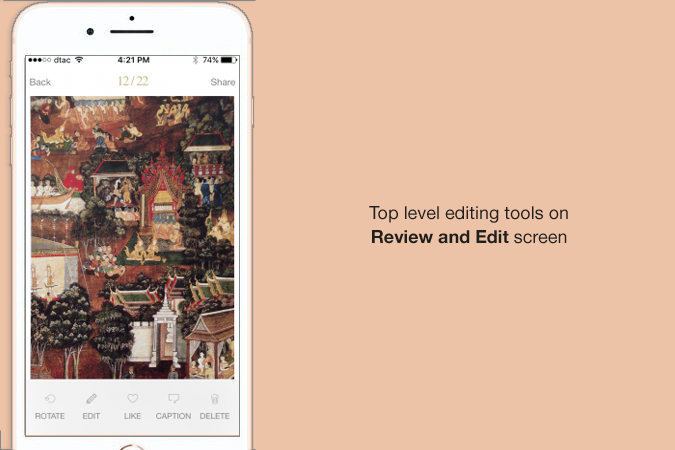
- Rotate: Each tap rotates the photo by 90 degrees.
- Edit: Launches the advanced tools. See below.
- Like: Adds photos to an auto-created Favorites album.
- Caption: Lets you add or amend when, where, who information.
- Delete: Deletes the photo from Gallery as well as albums.
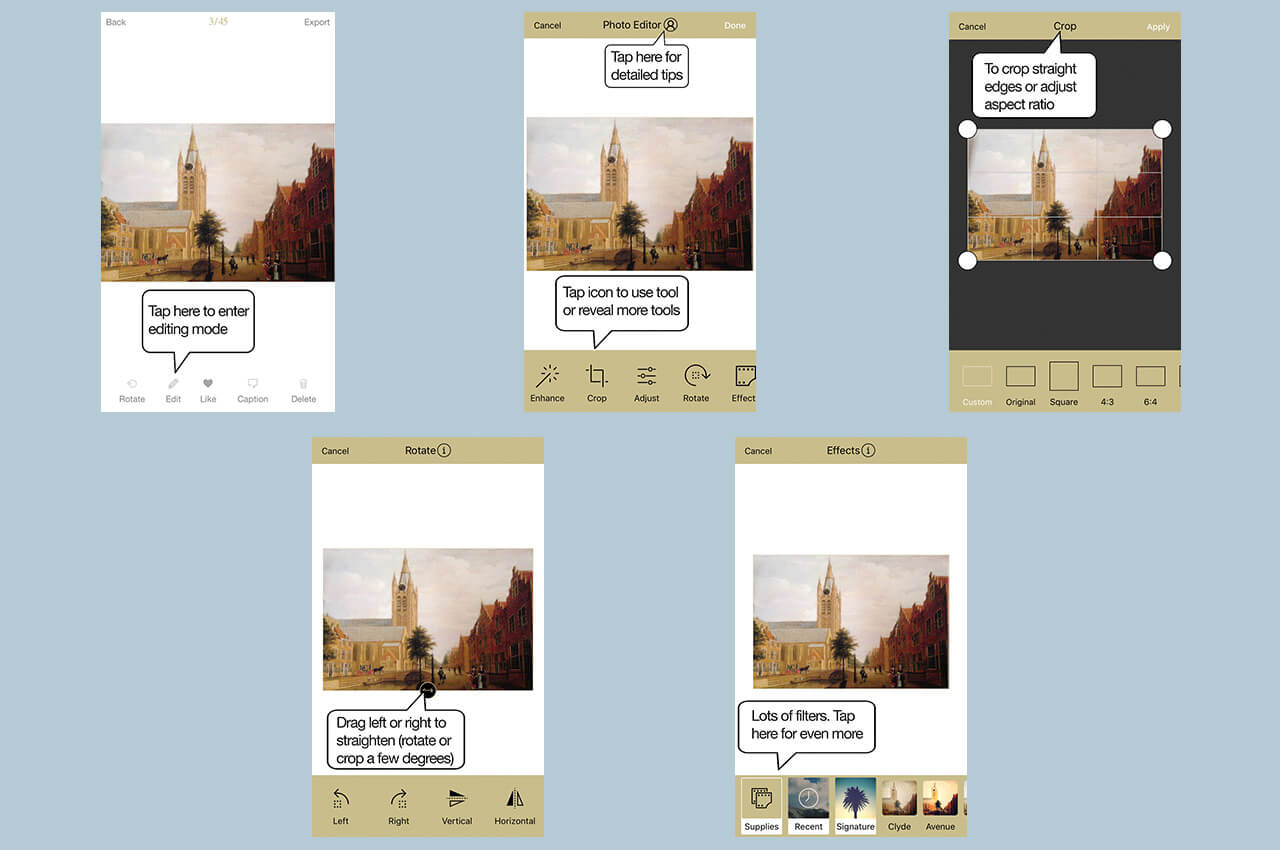
Launching the image editor
To start editing photos, tap Edit button on Review & Edit screen. The current photo opens in the image editor. Scroll the bottom navigation bar to see the top-level tools. More tools can be accessed by tapping these buttons. After you have applied a correction, tap Apply. This shows you how the photo will look with your edit. You can still cancel the edit or go back and edit more. Once you are happy with the changes, tap Done. This permanently replaces the previous version with the edited one.
Quick and Essential Tools
- Enhance: One-touch optimization of photos, with 5 preset modes. Each mode applies a preset combination of settings. If one of these does the job for you, that’s great.
- Crop: Trim photo to any aspect ratio: preset or custom. Use it to improve composition and visual impact.
- Rotate and straighten: Rotate photo left or right (90 degrees at each tap), flip vertical or horizontal, or straighten photos. To use Straighten tool, press the double-sided arrow at bottom center of the photo and drag it a bit to the left or right. Use it to level the horizon in photos, or to give an interesting, artistic slant to a photo.

Tools Within Adjust Tab
Most of these functions are interrelated. Adjust one or two, not everything.
Brightness uniformly changes all the colors, from very light (white) to very dark (black). It makes the overall picture lighter or darker, but doesn’t brighten or darken selective areas.
Exposure relates to the amount of light used in capturing the image. Less light than needed, the photo are dark. Excess light, the other way round. This tool compensates for too much/too little light. Use it carefully: excessive adjustment will add noise to the image.
Contrast is the difference between light and dark areas of the photo. Increasing contrast makes the light areas lighter and dark areas darker – making details more obvious. Decreasing contrast reduces the difference.
Warmth: Increasing warmth boosts orange tones; decreasing it boosts blue tones.
Saturation: Color intensity and purity. If a photo looks dull, a slight saturation boost will improve it. This adjustment changes the intensity of all the colors equally, so use for old photos where all the colors have faded equally. Use sparingly on portraits or people photos – excess saturation imparts an unnatural red hue to skin.
Vibrance: Akin to saturation, yet different. Increasing it will increase the saturation of less-saturated colors more than the colors that are already saturated. It also prevents skin tones from becoming over saturated.
Shadows / Highlights: These are used to brighten the dark areas of a picture and darken the bright areas. If you’ve got a photo in which the subjects’ faces are dark but everything else is OK, you can improve the photo by using Shadows (not Brightness) tool. And if your photo is OK in all other respects but the clouds in the sky look washed out, use Highlights adjustment.
Fade / Tint: “Fade” softens the colors to create an old photo effect. “Tint” adds a hue: Use the slider to change the hues.
Tip To Avoid Glare and Shadows:
Photos or scans taken in bright light may contain glare. Lens glare can be easily avoided by slightly changing your position or camera direction, but if you already have a photo with glare, adjust (increase) Highlights, (decrease) Shadows, and – if necessary – decrease Brightness. Won’t completely remove glare, but will visibly improve the photo.
Other Post-Processing Tools
- Focus and blur: Linear and radial focus modes. Ability to blur out lines/wrinkles and subtly soften edges.
- Blemish removal for stains or dirt marks: Select the correcting circle size and tap repeatedly at the blemish. This tool samples the pixels all round where you tap, and filling the circle with the interpolated color. It’s not perfect, but works.
- Sharpen: This tool increases the contrast between dark and light pixels at the edges of objects in a picture. Use it AFTER you finish editing a photo, as the final step in the editing process. Again: less is more. Do not over-sharpen!
Photo Primping Tools
- Effects: Lots of amazing filters. See your photos in a completely different light!
- Frames: Photos looking too plain? Add a funky digital frame to make it Instagram-ready.
- Overlays: Want to make your photo in circular, diamond or grid shape? Use this tool. The shapes are a bit limiting and could be improved, but hey! It’s not bad.
- Text: This one is really cool: Overlay text on photos. Type in the text box, tap Done, then drag the text anywhere, reorient or resize it. Change font or color. Fun!
- Meme: Add fun blurbs to pictures, on top and bottom, for sharing.
- Vignette: Give photos a vintage look. As much or as little as you want.
- Splash: Selectively recolor your photos. Addictive! See an example here.
- Draw: Select drawing tool and color, and use your fingertip to draw on the photo.
A more detailed version of this article, with more illustrations, can be found here.
Don’t yet have Pic Scanner Gold? Read about it here, and download here. If you use our old app Pic Scanner, you can transfer all photos, albums and captions to Pic Scanner Gold in under a minute!
Adding Captions and Editing Metadata
In addition to editing, you should also add a short description summarizing the who, what, when, where of photos. This is really easy to do, and it provides two benefits:
- It preserves all the important details about the photo. So nothing is forgotten even when you view the photos after many, many years.
- Once you embed this information in your photos, you can instantaneously retrieve the photos you need with any photo program, by simply keying in one or two cue words.
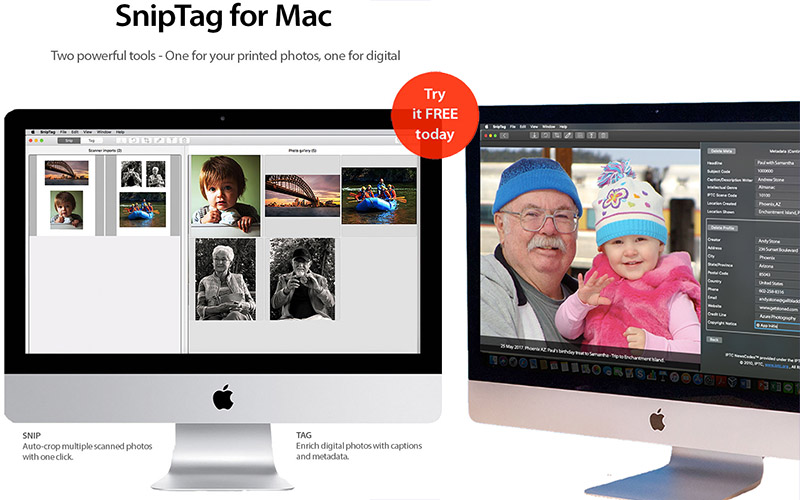
Doing this is really easy, especially if you have a Mac, and an app named SnipTag. This app lets you add visible captions and invisible metadata to photos, either by typing or voice dictation. You can even do this in batch mode. For example, if you have fifty photos of Phil and Jenny’s wedding that took place in Syracuse, NY, on 15th May 1997, just select all and dictate these facts just once to add them to all 50 photos. To learn more about metadata editing, read this article.
Check out SnipTag on the Mac App Store. It’s quite a useful app to have – especially if you have thousands of digital photos. Its AI-powered, precise batch-cropping will floor you!