

Pic Scanner Help and Troubleshooting guide covers frequently asked questions about Pic Scanner. If your question is not answered here, email us. For in-app tips, tap ‘Menu’ on Camera screen. For ready reference, print our 5 Minute Guide.
If you use Pic Scanner on iPhone 6S, iPad Air 2 or newer devices, get Pic Scanner Gold for high resolution scans and many more features. Upgrade at a discount with this bundle. FAQ for Pic Scanner Gold can be found here.
Pic Scanner Help & Troubleshooting
APP INSTALL & UPDATING HELP
A1) How to transfer Pic Scanner to a new iPhone or iPad, along with the photos, captions and albums? Please see illustrated, step-by-step procedure here.
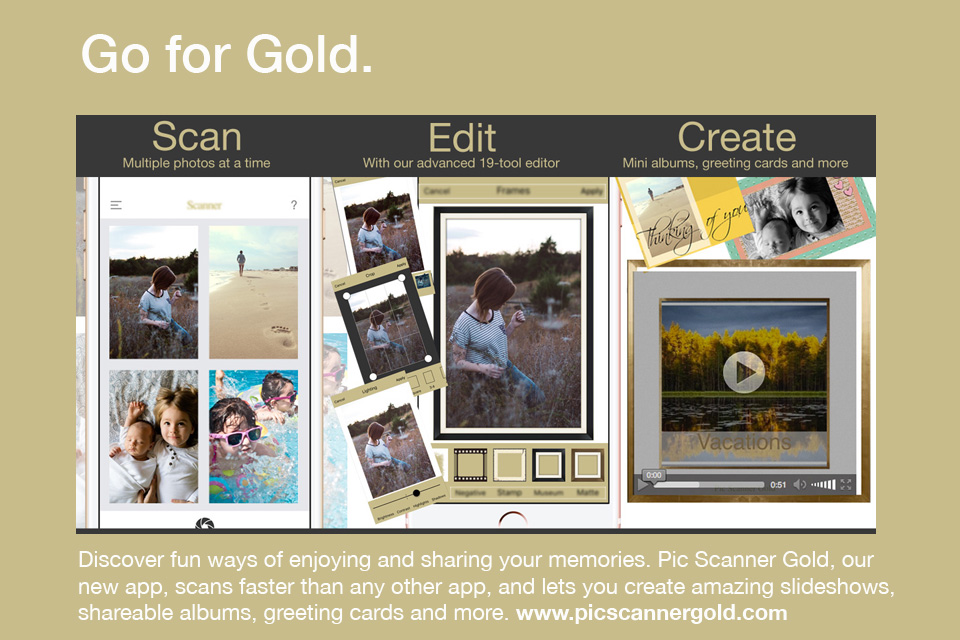
A2) Should I buy Pic Scanner or Pic Scanner Gold? What’s the difference? Pic Scanner is our lightweight app, meant for older model iPhones (iPhone 6 and older) and older iPads (iPad 4 and older). It offers all the essential scanning features at a low price. Pic Scanner Gold is our advanced app, for newer devices. It does everything that Pic Scanner does, plus: gives higher resolution scans, has superb editing tools; lets you make photos into beautiful greeting cards, calendars and shareable slideshows; and allows many more export options.
A3) I have many photos and albums in Pic Scanner. If I buy Pic Scanner Gold, how to transfer them to the new app? With both apps installed on your device, launch Pic Scanner > tap Menu > select Migrate > from export options, tap Copy to Pic Scanner Gold. All cropped photos, albums and captions will be instantaneously transferred to Gold (Watch video here).
A4) I’m not an iPhone/iPad user, but do have a scanner, digital camera, or Android phone. Can I use Pic Scanner? If you have a Mac, see SnipTag app. It lets you batch-crop scans from any scanner, digital or smartphone camera. It also has other powerful features.
SCANNING HELP
S1) Can’t scan. All I see is a white screen: You must allow Pic Scanner access to the camera. Go to Settings > Privacy > Camera > Turn on Pic Scanner.
S2) Can’t save cropped pictures to Photos app: You must allow Pic Scanner access to Photos app. Go to Settings > Privacy > Photos > Turn on Pic Scanner.
S3) Scans are blurry: Camera auto-focuses within 2 seconds of pointing it at the photos being scanned. To fast-focus, tap the screen once.
S4) Scans look dull and of low resolution: Read this post for tips on how to get pro quality scans.
S5) In which format are scans saved? The pics are saved as JPEG (.JPG) files, and optimized to give best quality (pixels) with minimal file size (bytes).
S6) Is Pic Scanner suitable for left-handed users? Yes. On iPhone: In portrait mode, Scanner button is at the bottom. In landscape, hold iPhone with Home button on left to get the Scanner button on the left. On iPad: In portrait mode, Shutter is on the right. Turn the iPad upside down to get it on the left. For landscape, rotate the iPad until the button is at the bottom.
CROPPING HELP
C1) Where are cropped photos saved: Tap thumbnail on top left of Scanner screen to go to Cropped screen. Here, you will find thumbnails of your cropped photos. Tap any to open photo. Tap Original button on bottom left of Cropped screen to see un-cropped versions of your scans.
C2) The photo I scanned isn’t on Cropped screen: Check Originals screen for uncropped photos. If the photo is on Originals but not Cropped screen, it wasn’t scanned properly. Also see this post on how to avoid wrong or no cropping. For now, re-scan the photo, or crop it manually by using Trim at the bottom bar of Originals screen.
C3) Cropping is wrong: See this post for illustrated tips on how to get accurate auto-cropping. You can also manually crop photos from Originals screen.
C4) Can I disable automatic cropping? Auto-cropping is a real effort-saver in Pic Scanner. If you follow the tips in C1 above, automatic cropping will be very accurate. If you have to use uncropped photos for editing/sharing, transfer them from Originals to Cropped screen.
BUYING HELP
B1) How much does the app cost? How to buy unlimited scanning? Please visit our App Store pages – here for Pic Scanner, and here for Pic Scanner Gold, to see the price in your currency. Both apps allow unlimited scanning, and require no sign-up or recurring subscriptions.
B2) App Store doesn’t let me purchase anything. Go to Settings > iTunes & App Store, log out by tapping your Apple ID and selecting Sign Out. Reboot your device. Return and log back in. If this doesn’t work, call Apple Support.
B3) Do I have to pay separately for using the app on iPhone and iPad? No. If both devices are linked to the same Apple ID, you pay only once. If you buy the app on iPhone, the message Buy Unlimited vanishes after purchase. Download the free version on iPad > Tap Menu button on Camera screen > Buy Unlimited > Restore Purchase. Unlimited scanning is enabled.
SAVE & SHARE HELP
T1) How to save scanned pictures to Photos app or Dropbox? Tap Select on Cropped screen > select thumbnail(s) > Export > From sharing options, select Photos or Dropbox.
T2) How to transfer scanned pictures to computer? There are two ways to do it:
Method 1 (Airdrop): Ensure that your iPhone/ iPad and Mac are both connected to the same wifi and have Airdrop enabled. Tap Menu > Backup > Mac / Cloud > When export locations are shown, wait until your Mac shows up in Airdrop options, and select it. This will save a zip file of all your photos on the Mac. Unzip it, and your photos will be in a folder named splitted_images.
Method 2 (iCloud): On Cropped screen, tap Select > choose photos > Export > Photos. If iCloud is enabled, photos will automatically sync to Photos app on computer.
T3) How to save to OneDrive, Google Photos or other cloud services? See Method 1 in T2 above. When export locations are shown, choose Save to Files. Within it, you’ll see OneDrive, Google Photos or other cloud storage apps on your iPhone/iPad. Select desired.
T4) How to export photos from Originals screen? Tap Select > choose photos > Move. Photos are moved to Cropped screen, and you can export them.
T5) How to export albums and captions? To export captions, select photos > Export > On ‘captions and borders’ screen, select ‘Include’ (Unlocking requires a one-time purchase.) Album exports are available in Pic Scanner Gold, not in Pic Scanner.
T6) Where are the photos uploaded to Dropbox saved? In App > Pic Scanner folder.
ALBUMS HELP
A1) How to create albums? Two methods:
Method 1. Start on Cropped screen > Albums > Create new album > Assign name to album > Save > Album is created. Now add photos: Tap empty album > Add photos > tap Cropped album (thumbnail on top left) > Select photos > Done.
Method 2: Start on Cropped screen > Select > choose photos > Add > Add to New Album > Assign name to album > Save.
A2) How to add more photos to existing album? Start on Cropped screen > Select > choose photos > Add > Add to existing album > tap on the desired album’s thumbnail.
A3) How to keep track of which photos I have added to the album and which I haven’t? In Cropped gallery, select the photos you want to put in an album > Albums > Add to existing > Select album. This will add only those photos that aren’t already there in the album, without duplicating those already there.
A4) How to delete an album? On Album covers screen, swipe left on the album to be deleted > Tap Delete.
A5) How to make scanned photos into a photo book, greeting card or calendar? Save photos to Dropbox or computer as explained in T1 and T6 above, then upload to your preferred photo printing website. Also read this post.
A6) How to rearrange the photos in an album or for showtime slideshow? Pic Scanner does not have this feature. Please upgrade to Pic Scanner Gold for this and many other features.
SHOWTIME SLIDESHOW
S1) How to play/mute music with ShowTime slideshow? Tap the screen while slideshow is playing. A bar appears. Tap the loudspeaker button on it.
S2) Can I create a slideshow using some photos scanned with Pic Scanner, and others I have on my computer? Yes! Save the selected photos from Pic Scanner to Photos app on your iPhone or iPad, and sync to computer. Now open iPhoto, and follow this easy tutorial.
GENERAL HELP
G1) Is the resolution good for printing photos? If planning to make reprints, scan 1-2 photos at a time (not multiple). This will give you good enough scans for 240-300 DPI prints. Better still, upgrade to Pic Scanner Gold for higher resolution scans.
G2) Trying to send message through the contact form, but it says ‘Failed. Try again’. This can happen if you are not on wi-fi. If away from wifi, go to Settings > Cellular, and ensure that Pic Scanner is ON.
G4) I am out of space on my iPhone/iPad. What to do? Free up space by deleting unneeded originals. Tap Originals button on Cropped screen, and delete the un-cropped photos. You may also back up cropped photos on computer or in Dropbox, and delete from Pic Scanner to free up space on device.
G5) Is it necessary to save scanned photos in Dropbox or computer? Yes. Archiving scans in cloud or computer is a must. It ensures that your photos stay safe even if you lose your device – or accidentally delete Pic Scanner.
G6) The app is frozen. Double click Home > Close Pic Scanner by sliding its tile out of multi-tasking tray > Press Home > Launch Pic Scanner. It will work normally.
G7) I deleted scanned photos. Can I recover them? Open iTunes and see if you have a recent backup. Restore procedure is similar to this. Without a back-up, you can’t restore. We save photos in the app itself, not on server. When you delete the app, its contents get deleted. To prevent such accidents, please periodically save scanned pictures to computer or in Dropbox.
Any questions or suggestions, email feedback @appinitio.com