Top Tips For Accurate Automatic cropping
Automatic cropping is a great effort-saving feature, but what if it goes wrong? The app splits photos in random places or distorts them? You could always re-scan, but wouldn’t you rather get it right in the first place?
Follow the simple tips given below, and you’ll get accurate cropping every time.
- The most common mistake? Many beginners get #4 wrong
- These tip apply to Pic Scanner as well as Pic Scanner Gold
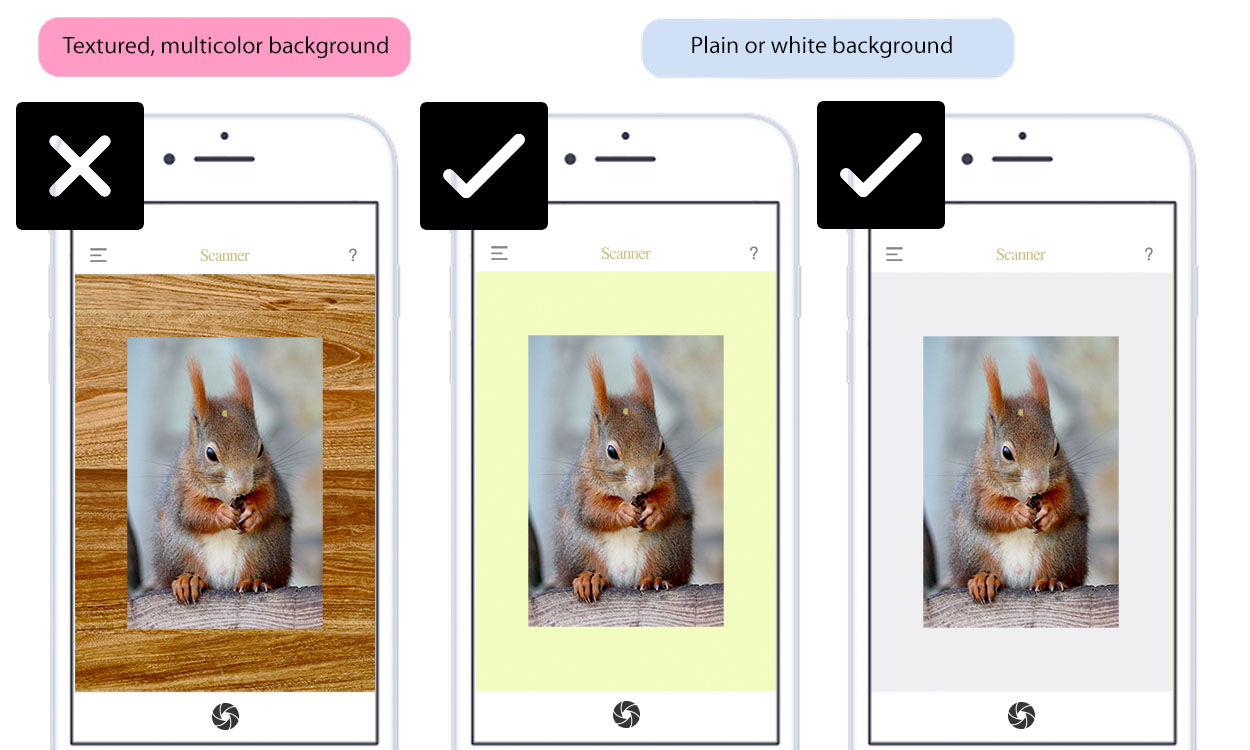
Tip #1): Use plain background
Lay photos on a plain white or single color surface. Multi-color background won’t work well. In the pictures below, #1 may lead to wrong cropping, while #2 and #3 are fine:
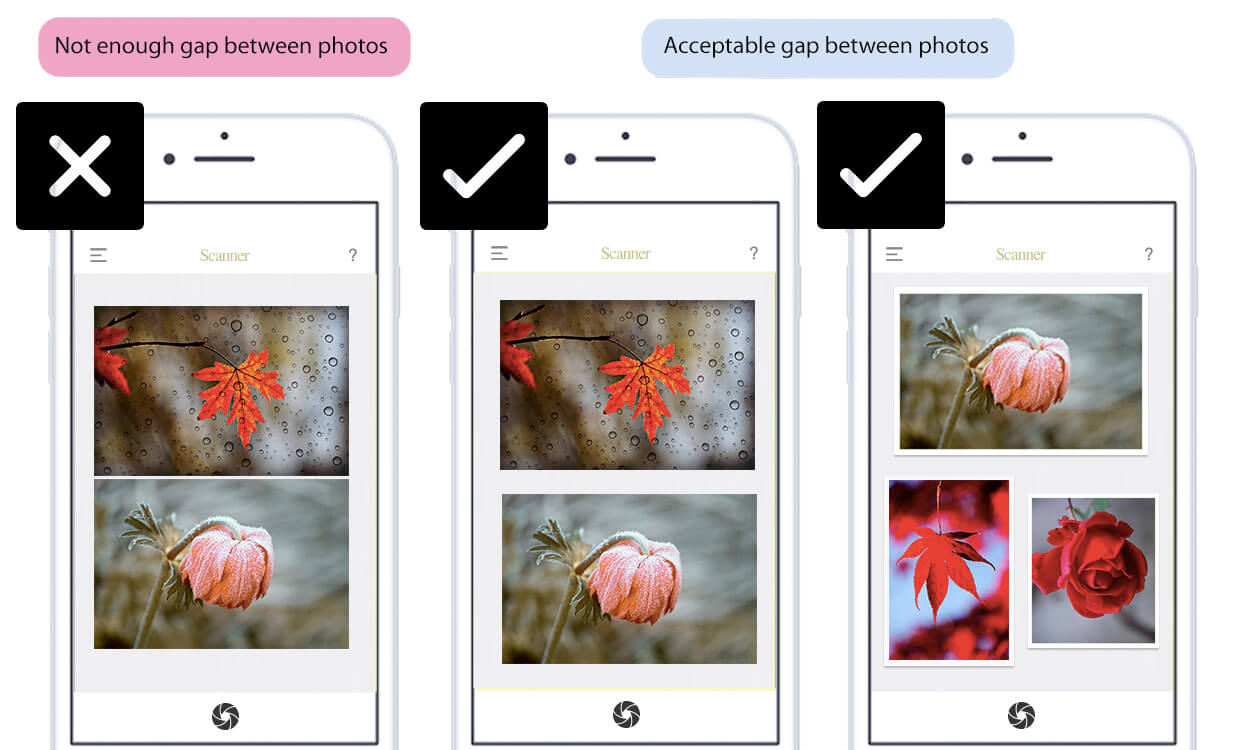
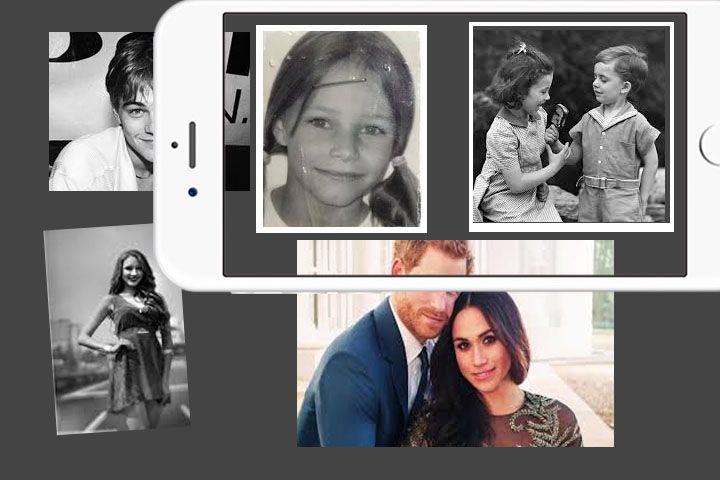
Tip #2): Mind the gap
When scanning multiple photos in one shot, keep 1/2-inch i.e. 1-1.5 cm gap between them. If the pictures are too close together, the app may not recognize them as separate images. In the screen shots below, #1 is wrong, #2 and #3 are fine:
If scanning photo albums, you can scan an entire page at a time – again, provided that there is a gap between the photos (and the background isn’t patterned). See these examples – what’s OK and what isn’t:

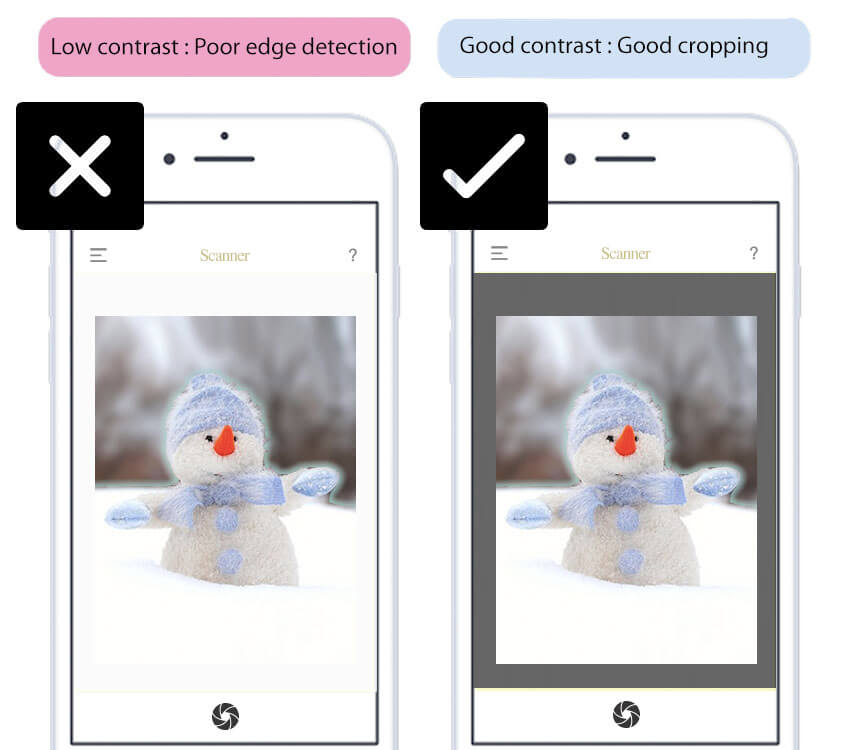
Tip #3): Use contrasting background
It helps to have some color difference between the photos’ edges and the background. So, when scanning a snow scene, place the photo on black or dark background. In the following example (left), it’s very difficult to identify the photo’s edges against the bluish white background. Placing the photo on a dark background (right) will improve automatic cropping:
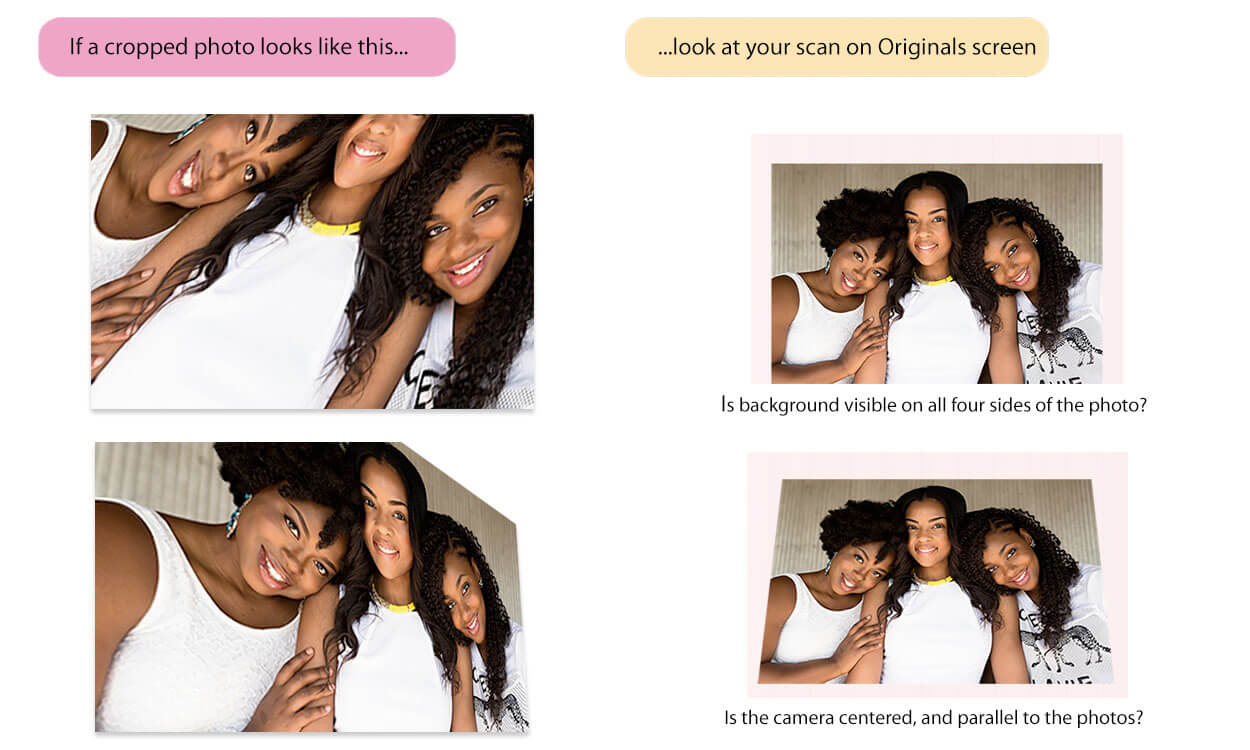
Tip #4): Keep background visible all round
This must be put in RED LETTERS: When scanning, the background surface must be visible along all 4 edges of the photos. If any photo extends up to the edge of the viewfinder frame or extends beyond it, cropping will be wrong.
Below, #1 is wrong (The photo’s bottom edge is reaching the viewfinder’s edge, and the black background is only visible along the other 3 edges). Example #2 shows the correct way to scan: Black background visible all round. Note that #3 is also correct, but here the camera is held too far away from the photo, and will result in a lower resolution scan:

Scanning in line with the above four tips will eliminate 90% of cropping errors. If cropping is still wrong (e.g. 3-4 photos are cropped as one, or scans are distorted), look at the un-cropped photo on Originals screen. Is background visible all round? Is the photos properly spaced apart? Is the background single-color and contrasting with the photo’s edges?
If you are doing everything right but auto-cropping is still wrong, see the following tips for “outlier” situations:
Extra! Some Bonus Tips
Tip #5): Don’t scan through plastic
If your photos are in albums with plastic sleeves, consider taking them out. This will (a) make cropping more accurate (b) let you avoid glare and reflections, and (c) save your photos: these sleeves are acidic, and will ruin your photos over time. Sleeves also trap air bubbles, and traces of moisture in it will also harm the photos.
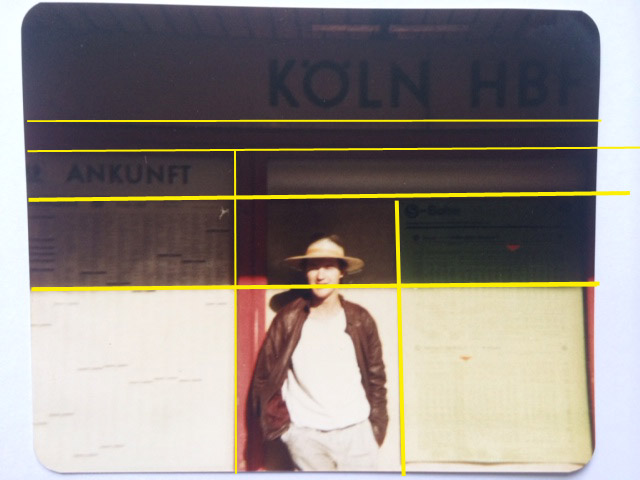
Tip #6): Avoid perspective distortion
While scanning, center the camera above the photos and hold it parallel to them – not off-center or at an angle to them. In the above illustration, the photo on the bottom right looks trapezoidal instead of rectangular, due to camera tilt. Pic Scanner and Gold both have built-in automatic perspective correction, but avoiding perspective error in the first place is better.
Tip #7: Manually crop long ‘n narrow pics
Photos with (Length > 2.5 times width) may not be cropped correctly. Crop these manually from Originals screen.

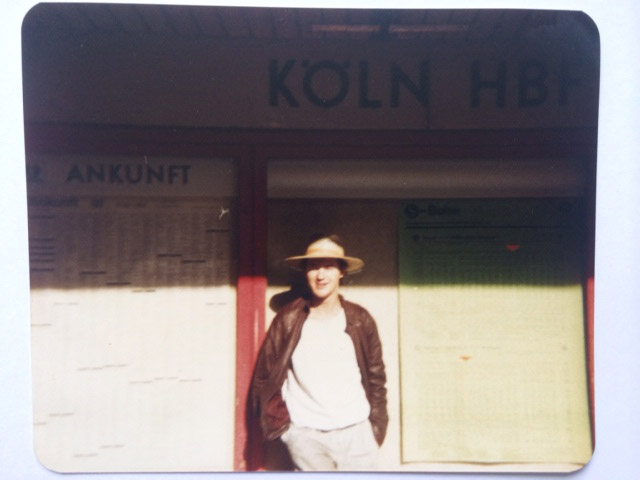
Tip #8: Manually crop photos with sharp gradients
The photo on the left, below, has many sharp, straight color gradients. The app may mistake these “lines” for the photo’s edges (We’ve added yellow lines in the photo on the right, below, to show where cropping might occur):
Tip #9: Scanning collage-like album pages
If the photos in your albums are too close together (but not touching), you can still auto-crop them. Even 6-8 mm gap is enough for the app to recognize separate photos. Scan one or two photos at a time instead of the entire page, by holding the camera closer to the page (See below: Scanning 2 photos at a time). With a bit of trial and error, auto-cropping will work.
Manually cropping photos
If cropping is wrong, crop the photo manually from the Originals screen. Tap Original thumbnail > Trim > Adjust size and position of the cropping rectangle > Crop. The photo will be saved on Cropped screen.
Can you turn off automatic cropping or share originals? Automatic cropping is an effort-saver, and the above tips will help you get it working. However, you can also transfer Originals to Cropped screen for sharing: On Originals screen, tap Select. Tap one or more photos to select them. Tap Move, then Move to Cropped.
***
If nothing works and you can’t figure out why, just send us the cropped and original photos. We will analyze and guide you on what to do.